Managing Collections from 3rd Party Creators
Asset Layer empowers apps to open their ecosystems to 3rd party creators who can submit collections to be included in your app. As an app owner, you'll have complete control to allow or deny any collections submitted. This guide below will walk you through the process of enabling collection submissions and managing collection proposals from other creators.
Establishing Revenue Share settings between App and Creator
Asset Layer uses a preset revenue share percentage to determine how all income from sales related to a 3rd party collection is distributed between an app owner and the collection creator. This ensures that a collection submitted by a 3rd party creator is beneficial to both app and creator.
Before opening your app to creator collection submissions, we recommend first establishing your revenue share percentage. To get started, navigate to the app settings menu for the app you wish to open to collection submissions.

Scrolling down the app settings page, you'll see a section titled 3rd Party Revenue Share. In this setting, you'll see a slider that allows you to select a revenue share percentage. This percentage determines the amount of revenue that will be distributed to the collection creator. For example, in the case of a 60% revenue share, the creator will receive 60% of all income from sales related to the collection.

Creating a slot for creator submissions
Now that you've established a revenue share percentage, you need to ensure that you have at least one slot that is open to collection submissions.
If you wish to create a new slot to accept collection submissions. Get started by clicking the "Create a New Slot for your App" button.
To learn more about slots, check out our docs on core concepts (slots).

After filling out the relevant info regarding the Slot Name, Description, and Thumbnail, you'll also have an opportunity to select slot permissions using the settings on the right side of the page.
The red arrow (below) establishes whether or not a 3rd party creator can submit a collection to this slot. This is the key setting used to enable collection submissions, select the "Allow third-party Collections to be submitted" option.
The Blue Arrow (below) determines which types of collections can be submitted to this slot. As the slot owner, you can choose to allow only unique collections, only identical collections, or both collection types.

It is worth noting that you can also change the permissions of an existing slot at any time by clicking on the slot within the Manage Slots tab and scrolling down to the page to the slot permissions section.

Now that you have a slot with the correct permissions established, you are all set to start receiving proposals from creators!
Viewing Collection Proposals
To get started with reviewing collections submitted to your app, first navigate to the Manage Collections tab for your app.

To view proposals, simply click the "Manage Collection Proposals" button.

From within this screen, you'll be able to view any incoming proposals for both new collections and changes to existing collections. Clicking the refresh button in the top right will ensure you see all submissions.
To view any individual submission, simply click the review button on the right side of the submission.

After clicking the review button, you'll have the chance to view all information relevant to that particular collection as well as a message from the collection creator. Before accepting or declining any collection, we recommend doing a thorough review of the proposal with special attention to the requested collection permissions.

Collection Permissions
Collection Permissions determine how your collection is treated between you and the creator of the collection. This includes who has control to mint the collection and how it is distributed. The three possible options for collection permissions are listed below:
Creator Permissions
App will be able to control the minting and distribution of the Assets.
Revenue split is determined by App’s revenue share (see revenue share above) and how app chooses to distribute Assets.
Apps can choose to distribute assets as they please (i.e. giving away for free or selling in a marketplace).
Shop Only Permission
Your collection will only be allowed to be distributed through direct sales in the app’s shop.
As the creator, you will earn a percentage of sales based upon your agreement with the app owners (see Revenue Share above).
If selected, you will establish a price for each sale from your collection in the next phase of the submission process.
App Minting Permission
Maintains rights for the creator (you) to handle all minting and distribution.
Assets minted from this collection will be sent to the creator’s wallet.
Creators can choose to distribute assets as they please (i.e. listing in public marketplace, sending to others directly).
For collections that select the Shop Only and App minting settings, a revenue share percentage will automatically be enforced based on the revenue share settings set by the app owner.
Note that regardless of which permissions are selected, only the collection creator can make changes to the collection. However, all changes must be approved by the app owner before taking effect.
Approving Proposals and Declining Proposals
After reviewing the proposal information, you'll have a chance to decline or accept the collection using the buttons at the bottom of the proposal.

Denying a collection proposal
If choosing to deny the proposal, you'll have the option of providing some feedback which will be sent back to the collection creator. Collection creators are given the chance to revise their proposals and resubmit. As such, this is a great opportunity to let creators know about any tweaks they could make to improve the chances of approval. Providing good feedback can be key to helping creators submit collections that are a good fit for your app!

Approving a collection proposal
If choosing to approve a collection proposal, you'll have a small review screen that will confirm your decision. Clicking the "Confirm" button will officially add the collection to your app!

Minting Creator Collections (with App Minting Rights)
If the collection has a permission for App Minting Rights, you'll be able to mint the collection the same way that you would mint any other collection owned by your app. Head to the relevant collection page by navigating to the "Manage Collections" tab to see and selecting the collection. Once on the page, click the "Mint More" button to open the mint menu.

Mint Menu
The mint menu allows you to choose how many assets from the collection you'd like to mint. In many cases, you'll want to mint your whole collection at once, simply click the checkbox to do so. If you'd like to only mint part of the collection, enter the number of assets you'd like to mint into the appropriate text box. Once you're satisfied, simply click the blue "Mint X Assets" button and your collection will be minted as requested!

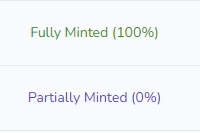
Mint Status
You can check the status of your mint at any time by clicking the blue "Refresh" button in the collection details or by viewing the mint status column within the "Manage Collections" tab.
Reviewing Change Request Proposals
Asset Layer is all about supporting change and flexibility. As such, we allow creators to submit change requests for their collection at any time. These requests are sent to the appropriate app for approval. These requests can be for a number of things related to the collection, such as adding assets to support additional expressions or making a change to the collection's description. To view incoming change proposals, simply navigate to the same "Manage Collection Proposals" screen. A quick summary of the changes made can be seen in the Changes column.

Change requests follow the same flow as the original collection submissions. Simply click the review icon to view the proposal, and use the accept or deny buttons at the bottom of the proposal to choose whether or not your app wants to accept the change.

Last updated