Create Assets for My App
This guide will walk you through the process of creating a collection for an app that you've created.
Before getting started with minting your first assets, you'll first need to create an app and a slot. Please check out our Quick Start guide and our guide to Setupyour first app. Once you have an App and Slot setup, you're all set to create a new collection and mint your first assets.
Getting Started
To begin the process of creating your first collection, start by selecting the app you'd like to create a collection for and navigating to the Manage Collections tab within your App's settings.

From this page, click the Create a New Collection for Your App to launch into the collection creation wizard.

Defining my Collection
You'll be brought to the "Create New Collection" screen where you'll have the opportunity to start defining your collection by filling out the following fields:
App:
Should be auto-filled with the app you selected earlier, dictates which app the collection will belong to.
Collection Name:
The name that will be used to represent your collection.
Select a Slot for your Collection:
Dictates which slot you're intending to create the collection for. Will impact the required expressions for your collection, thus impacting the file types required.
Select a type for your Collection (Coming Soon):
Determines whether your collection is a Unique or Identical collection. For now, all collections created through the no-code tool must be identical. Unique collections can still be created via code.
Collection Size:
Determines the maximum number of assets that can be minted from this collection.

After filling out the required fields, hit the Set Expression Values button to move to the next screen.
Filling out Expression Values
Expressions are used to accommodate the many ways that a single asset can be used across numerous applications. While some assets may be represented by images, others may also require videos, audio or animated models. Depending on the type of asset you're looking to create (as defined by the app's slot) you will need to provide assets for each required expression.
Menu View
The menu view is a universal expression that is required for every slot, regardless of the type of collection it is. The menu view is used to represent the asset within a visual interface (i.e. a marketplace or wallet) and must be a 500 x 500 image.

For each expression, there will be an individual page that gives the opportunity to upload the appropriate asset (i.e. an image file, audio file, etc...) Simply click the "Edit" button next to relevant expression. This will take you to a second screen that allows you to upload the asset(s) for each attribute by clicking the upload icon next to the attribute.

Required Expressions
It is worth noting that not all expressions are necessarily required in order to submit a collection. The required column next to each expression will display whether or not it needs to be completed before submitting.

Collection Images
Collection images function similarly to the menu view in that they are used to represent the Collection within visual interfaces. The difference between the menu view and collection image is that the collection image is used to represent the Collection while the menu view is assigned to an individual asset. This is less relevant for identical collections but useful for unique collections where each asset may vary. You can select "Use Menu Expression" which will make the menu view expression value from the asset in your collection with serial #0 the collection image. You can also upload a separate image for your collection image.

Collection Banner
You can also provide a collection banner. This banner will be used in the Asset Layer marketplace. Banners must be a .png or .svg with resolution 1640 x 200. You may use the default banner as well by selecting "Use Default Banner". Finalize Details
After uploading the necessary assets as defined by the slot, you'll have the opportunity to provide additional context for your collection. This includes a description for your collection as well as tags so that other users can easily search for it in contexts like the Asset Layer marketplace. When you're satisfied with the collection details, hit the submit collection button.

Confirmation
After clicking the Submit Collection button, you'll have a chance to review some of the details for your collection. If you are satisfied, simply click Submit. If you'd like to change anything, use the "X" in the top right corner and the back button to navigate to the appropriate page.

Minting your Collection
Once all of the required materials have been submitted for your collection, you're all set to begin minting. You'll be directed to the Collection Details page. You can also direct to this page by navigating to the "Manage Collections" tab to see any collection you have submitted.
In the Collection Details page, you can access important information regarding your collection as well as make edits to the collection images and expressions. You'll also see a large "Mint More" button (outlined in the screenshot below). Click this button to bring up the minting menu.

Mint Menu
The mint menu allows you to choose how many assets from the collection you'd like to mint. In many cases, you'll want to mint your whole collection at once, simply click the checkbox to do so. If you'd like to only mint part of the collection, enter the number of assets you'd like to mint into the appropriate text box. Once you're satisfied, simply click the blue "Mint X Assets" button and your collection will be minted as requested!

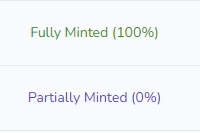
Mint Status
You can check the status of your mint at any time by clicking the blue "Refresh" button in the collection details or by viewing the mint status column within the "Manage Collections" tab.
Where to Find My Assets?
Congratulations on minting your first collection! The resulting assets can be found within the Asset Layer My Assets Page (accessible via the icon in the top right).

From here, you can choose to send any of the assets as a gift or list them in the Asset Layer Marketplace. You can also list your new collection in your app's Shop (currently only available through code).


Last updated